Tanzania · Trekking

10-Day Kilimanjaro Lemosho Route Trek to Uhuru Peak via Shira

10 Days Round trip from Arusha Easy pace

The journey

Trip highlights
  • 01 Climb Mount Kilimanjaro via the scenic Lemosho Route
  • 02 Trek from rainforest trails to the wide-open Shira Plateau
  • 03 Pass beneath Lava Tower and descend into the Great Barranco Valley
  • 04 Reach Stella Point at sunrise before continuing to Uhuru Peak
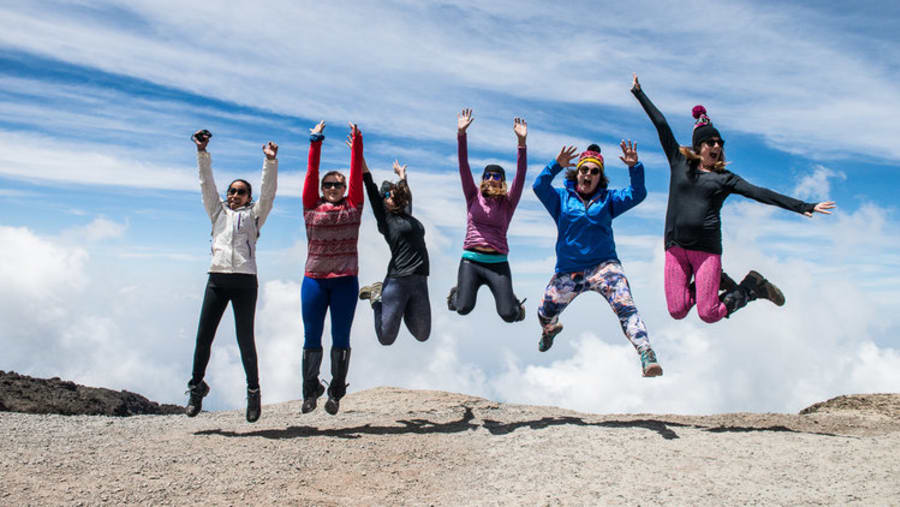
  • 05 Celebrate your summit with a Kilimanjaro National Park certificate

Follow the scenic Lemosho Route to the summit of Mount Kilimanjaro, the highest mountain in Africa. This 10-day trek begins in Arusha and climbs through rainforest, the Shira Plateau, Lava Tower, Barranco Valley, Karanga, and Barafu before the final push to Uhuru Peak. Trek with professional mountain guides, with time for acclimatization and rest built into the journey. Enjoy panoramic views from the top and a fully supported climb with camping on the mountain and lodge stays in Arusha.

This 10-day trek begins in Arusha and climbs through rainforest, the Shira Plateau, Lava Tower, Barranco Valley, Karanga, and Barafu before the final push to Uhuru Peak.

From the itinerary

At a glance

What this trip includes

Duration 10 Days
Tour type Shared
Activity level Easy
Accommodation Included · Standard
Transport Included
Wheelchair access Not applicable
Cities Arusha, Mount Kilimanjaro, Mount Meru
Languages English

Day by day

The itinerary

1
Day 01

Arrival in Tanzania and Pre-Climb Briefing

  • Stay at Arusha Safari Lodge, a beautiful hotel located on the lower slopes of Mount Meru and a perfect place to prepare for the adventure.

  • Gather in the evening at 5:30 pm for a pre-climb briefing and equipment check. Confirm that you have the appropriate mandatory medical coverage and travel insurance.

Dinner and overnight at Arusha Safari Lodge: bed, dinner, and breakfast included.

2
Day 02

Londorossi Gate to Mti Mkubwa Camp

  • After breakfast at the hotel in Arusha, drive for approximately 2 hours through the rural countryside to Londorossi Gate with your Lemosho trek guide. Complete the necessary park registration formalities at the Londorossi National Park gate, then continue through varied farmland with open views over the plains to reach the Lemosho road head. Start your ascent along the forest trail and camp at Lemosho Mti Mkubwa Camp.

Londorossi Gate to Mti Mkubwa Camp (2,650 m): 3-4 hours walking.

3
Day 03

Mti Mkubwa Camp to Shira Camp

  • Leave the forest behind as the trail climbs steadily with wide views to reach the rim of the Shira Plateau. Spend a full day trekking at a slow and steady pace up to Shira Camp.

Mti Mkubwa Camp to Shira Camp (3,550 m): 6-7 hours walking.

4
Day 04

Shira Camp to Shira Hut via Shira Cathedral

  • Today, follow an easy path to the summit of Shira Cathedral before reaching the next camp at Shira Hut. As this camp is quite exposed, it can be substantially colder than the previous night, with temperatures dropping to well below freezing.

Shira Camp to Shira Hut (3,840 m): 3-5 hours walking.

5
Day 05

Shira Hut to Barranco Valley via Lava Tower

  • Today, walk on a gentle ascent with panoramic views. Traverse the southwest side of Kilimanjaro, passing beneath Lava Tower and the final section of the Western Breach. After a hot lunch at the bottom of Lava Tower (4,600 m), descend to the bottom of the Great Barranco Valley (3,900 m).

Shira Hut to Barranco Valley (3,900 m): 5-7 hours walking.

6
Day 06

Barranco Camp to Karanga Camp

  • Take a steep climb up the eastern wall that leads you just below the Heim Glacier, where you can enjoy spectacular views of Kilimanjaro. Then make the steep ascent up the Great Barranco Wall, which separates you from the southeastern slopes of Kibo. The trail continues down into the alpine desert of the Karanga Valley, followed by a final steep climb up to Karanga Camp.

Barranco Camp to Karanga Camp (4,000 m): 4-5 hours walking.

7
Day 07

Karanga Camp to Barafu Camp

  • Today, take the Traverse Route up the Barafu Ridge and walk quite slowly to the final camp before your last ascent day to the summit. The remainder of the day is spent relaxing in preparation for the final ascent before a very early night.

Karanga Camp to Barafu Camp (4,600 m): 3-4 hours walking.

8
Day 08

Barafu Camp to Summit and Down to Mweka Camp

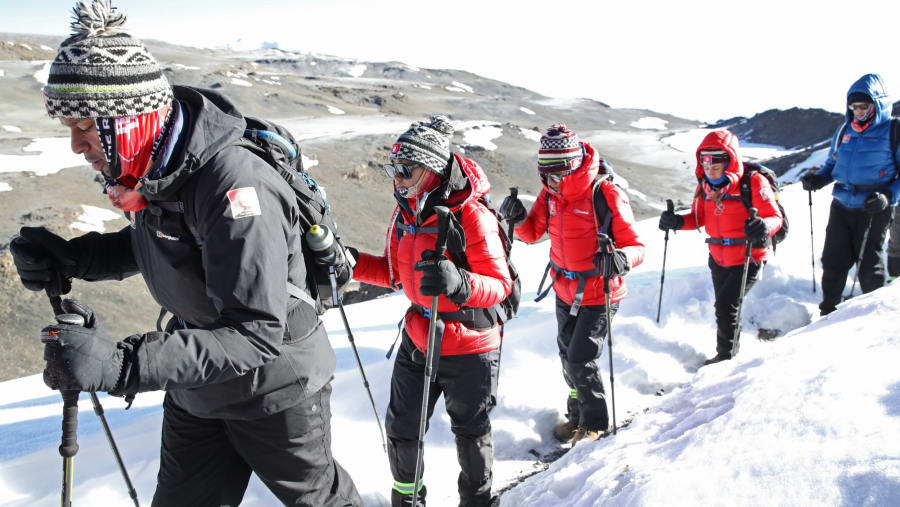
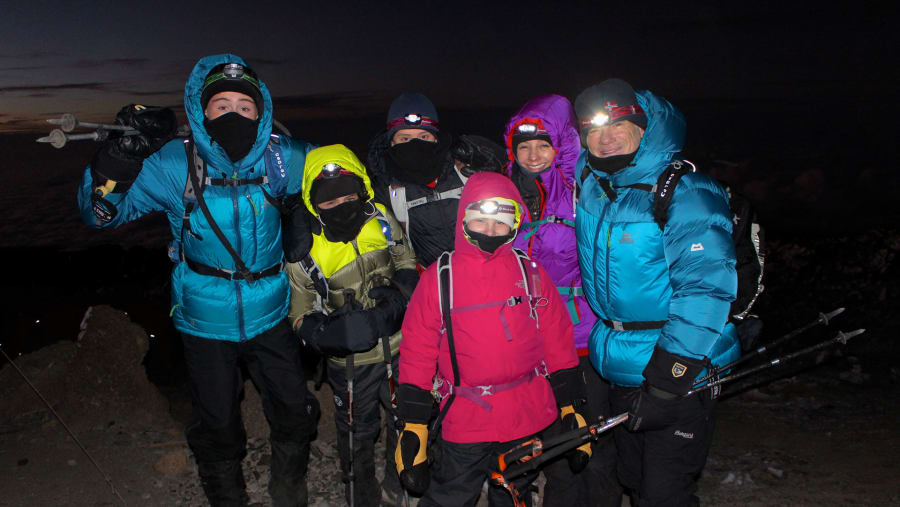
  • Wake up before midnight under the cover of darkness. Begin a steep climb over loose volcanic scree, where well-graded zigzags and a slow but steady pace will take you to the rim of the main crater at Stella Point, 5,735 m. Rest there for a few minutes to enjoy the sunrise over Mawenzi. Those who are still feeling good can continue slowly on the two-hour round trip from here along the crater rim to the main peak (5,895 m), the highest point in Africa. After a few minutes to appreciate your accomplishment, descend to Barafu, which is amazingly fast, and stop at Barafu Camp for some refreshment.

  • Continue descending to reach Mweka Camp.

Barafu Camp to Summit to Mweka Camp (3,100 m): 13-15 hours walking.

9
Day 09

Mweka Gate and Return to Arusha

  • A gentle walk takes you down through the rainforest to Mweka Gate, where successful climbers will receive their summit certificates. After lunch, drive back to Arusha Safari Lodge.

Mweka Camp to Mweka Gate: 3-5 hours walking.

Dinner and overnight at Arusha Safari Lodge: bed, dinner, and breakfast included.

10
Day 10

Departure Transfer from Arusha

  • After saying goodbye to your team of guides, take your private departure transfer from Arusha to Kilimanjaro International Airport (JRO) for your flight, unless you choose the option of a short safari or another extension.

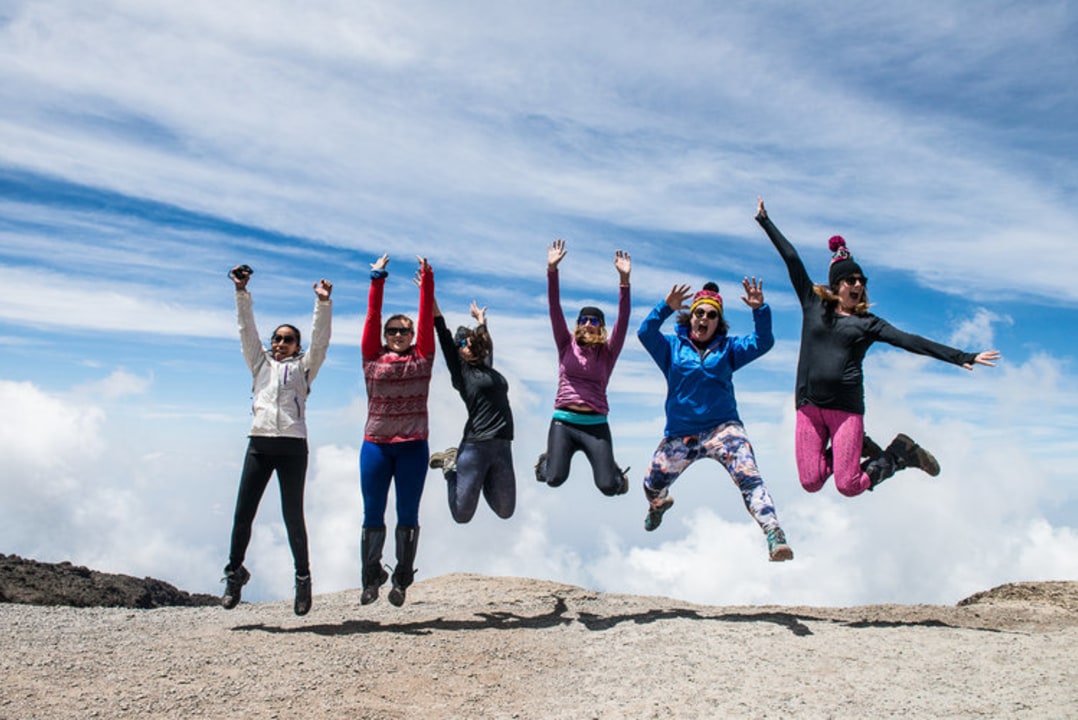
Shira Plateau, Lava Tower, Stella Point sunrise over Mawenzi

Where this trip takes you

Shira Plateau, Lava Tower, Stella Point sunrise over Mawenzi

The route

Where you'll travel

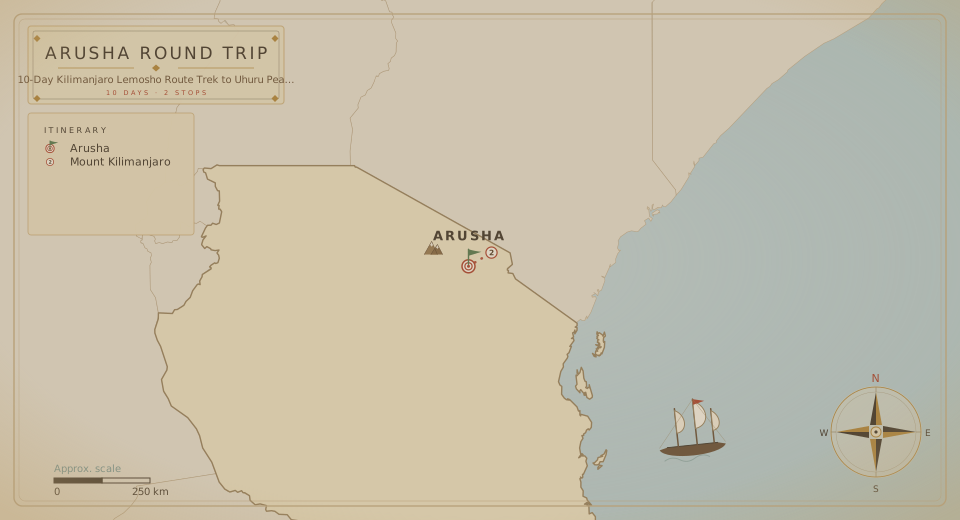
Tour route map
Round trip from Arusha 3 cities · 10 Days

The fine print

Trip details

What's Included

  • Tanzania VAT on tourism activities and park fees

  • Return transfers from Kilimanjaro Airport to Arusha and from Arusha to Kilimanjaro Airport

  • Hotel lodging the night before and the night after the climb, with dinner and breakfast included (double occupancy)

  • Bed, dinner, and breakfast

  • Transfer from your hotel to the starting point for your climb, and return to your hotel after your climb

  • Large portions of fresh, healthy, nutritious food

  • All Kilimanjaro National Park gate fees, camping fees, and climbing permits

  • Kilimanjaro National Park rescue fees (Kilimanjaro Rescue Team)

  • Emergency oxygen (for use in emergencies only - not as a summiting aid)

  • Basic first aid kit (for use in emergencies only)

  • Qualified mountain guide, assistant guides, porters, and cook

  • Salaries for the mountain crew as per guidelines set by Kilimanjaro National Park

  • Breakfast, lunch, and dinner, as well as hot drinks on the mountain

  • Camping equipment (tents, camp chairs, tables, and sleeping mattress)

  • Water for washing up daily

  • Porter to carry your duffel bag (maximum weight 15 kg / 32 lbs) from one camp to the next

  • Kilimanjaro National Park certificate for your successful summit attempt

  • A comprehensive Climbing Kilimanjaro travel info pack

  • Flying Doctor Service

What's Not Included

  • Items of a personal nature

  • Compulsory tips for guides, porters, and cook (average tip is anything from US $230 to US $300 per hiker - depending on the number of days, how many hikers are in the group, and the route chosen)

  • South African passport holders do not require a visa for Tanzania; however, most other nationalities require a visa for Tanzania.

  • Health requirements (Yellow Fever compulsory if travelling to Tanzania, as recommended)

  • Highly recommended travel and medical insurance

  • Personal hiking/trekking gear - some gear can be rented from our equipment store in Tanzania

  • Optional, but highly recommended, portable toilet

  • Snacks, personal medicine, and water-purifying tablets

  • Meals and drinks not specified, and snacks

What to bring

MOUNT KILIMANJARO TREKKING ESSENTIAL ITEMS:

  • Solid hiking boots - Boots should have high ankle support with a solid Vibram®, or equivalent, sole. Gore Tex®, or other waterproofing, is recommended for wet days as well as added insulation. Be sure to break your boots in at least 4 weeks before departure. Additionally, bring a spare set of laces.

  • Sunglasses - Your sunglasses should have 100% UV protection and should reduce glare as well as visible light. The frames should be lightweight with a wrap-around design for enhanced grip and staying power. Additionally, side shields are recommended to block peripheral light.

  • Day pack - The most important things to look for if you need to purchase one are the size (30L is good), hydration pack compatibility, hip and chest straps, internal frame, good padding on shoulder straps, and water bottle holders.

  • Water/windproof jacket - Your water/windproof jacket is your outer water-repellent layer. Gore-Tex, seam-sealed, is recommended, as well as a hood for added warmth.

  • Water/windproof pants - Your water/windproof pants will be worn on summit day as well as on rainy afternoons. These pants are essential for warmth and should be Gore-Tex lined and have lower leg zips.

  • Water/windproof mittens or gloves - These are used for extreme temperatures and are primarily worn on summit day. Be sure your gloves or mittens have a wrist cord as well as a reinforced palm to maintain grip during wet conditions. A removable liner is essential for drying, washing, and replacing.

  • 2 large duffel bags - One will be left at the hotel in Arusha to store non-essential gear when on the mountain, such as clean clothes for changing when off the mountain and for onward travel, and the other is for carriage by the porters when on the mountain.

THINGS TO KEEP IN MIND ABOUT THE ESSENTIALS

  • Look for items that will add less volume to your overall pack. We will be using porters to carry our equipment; however, they are limited in the amount each can carry. Heavy synthetic materials will be very limiting and could cause issues when packing up for the hike.

  • 2 pairs of synthetic warm-weather trekking socks - These socks are for trekking in the warmest part of the day since they are made of a Coolmax® fabric. Coolmax® wicks moisture, dries quickly, and breathes well, keeping your feet dry and helping to prevent blisters.

  • 4 pairs of heavier synthetic or wool-blend socks - Your wool socks are ideal for around camp when the temperature drops, as well as on cold mornings. Merino wool is very comfortable and dries quickly with fewer odours than synthetic blends.

  • 2 pairs of long underwear tops - This will be your base layer for colder mornings, evenings, and days when the temperature drops considerably. The material is lightweight, tight-fitting, moisture-wicking, and comfortable.

  • 2 pairs of long underwear bottoms - This will be your bottom base layer for colder mornings, evenings, and days when the temperature drops considerably. The material is lightweight, tight-fitting, moisture-wicking, and comfortable.

  • Warm pants - These pants are ideal for evenings around camp and cold days on the trail. Typically made of lightweight fleece and Wind Pro material, these pants should offer added warmth in case of cold nights or high winds on the summit.

  • Fleece top - This Polartec® 200 weight top will provide added warmth during the evenings as well as on cold morning starts. Please look for fleece material and stay away from cotton sweatshirts. Ideally, this item is worn over the thermal base layer and underneath your water/windproof jacket.

  • 2 pairs of shorts/pants for hiking - These convertible shorts/pants will be what we hike in every day. They should be made of a lightweight, quick-drying nylon material. Some come with UPF protection and mosquito protection.

  • 2 pairs of long- or short-sleeve shirts for the trail - Your trekking shirt is what we should wear early in the climb in warmer climates. The shirt is moisture-wicking, lightweight, and designed for multi-day hikes.

  • Mid-layer top - This shirt is a long-sleeve version of the one provided above. The long-sleeve trail shirt offers added warmth, more protection from the sun, and an additional layer for evenings and early morning starts.

  • Warm hat - This fleece or wool hat is ideal for evenings and will be valuable in the event of cold weather and temperatures on the summit. The hat should be tight-fitting with minimal loose ends.

  • Lightweight gloves - Fleece gloves are essential. Look for gloves that are Polartec® 200 weight with a leather-reinforced palm. For more protection, windproofing is available and will add an extra layer of warmth.

  • Balaclava - The balaclava provides added warmth on summit day and during colder evenings. The balaclava should be made of synthetic or wool material, lightweight, and close-fitting.

  • Sun hat - Your sun hat should be worn at the lower camps and should provide ample coverage for the face. A full-brimmed hat is good for added shade and increased sun protection. Additionally, a neck scarf should also be considered to protect the back of the neck.

  • Waterproof breathable gaiters - Your gaiters should be lightweight and durable. Look for Gore-Tex lining with the ability to fit over your boots. Velcro or adjustable sides for easy access are recommended.

  • Down jacket - An 800-fill down jacket will add much-needed warmth for cold evenings as well as the added layers for summit day. Down is recommended for its compressibility and is comfortable around camp in the early nights on the climb. Patagonia, Mountain Hardware, Marmot, and North Face are brands the guides wear.

ADDITIONAL ITEMS:

  • Head lamp - Petzl® and Black Diamond® make several models of small and efficient headlamps. Look for ones that have multiple lighting levels, LED bulbs, and use AAA batteries.

  • Please bring at least 3 sets of spare batteries to ensure ample lighting on your summit attempt.

  • Camp shoes (Teva, Crocs, sandals) - These are great for around camp after a long day on the trail. These can also be used for creek crossings that may be higher than the boot. Flip-flops work well in warmer climates but are not as effective during cold nights.

  • Hydrator - Hydrators are ideal when hiking for several hours because they enable you to drink slowly and frequently. 2-3 litres is a good size and should fit easily into your pack. All Camelbaks® come with a bite valve, or on/off switch, as well as a large access port for filling. You must bring a neoprene sleeve for the hose to prevent freezing.

  • Bug spray - DEET-based products work well, and we find that the spray-on versions last longer and are less messy. Repellents of 4-6 ounces that are perspiration- and splash-resistant are great.

  • Sun screen - SPF 30 or higher is recommended, as well as waterproof and sweatproof protection. 8 ounces will be plenty, and we typically carry one with 45+ SPF for our faces and SPF 30 for other exposed areas. Banana Boat, REI, Kinesis, and All-Terrain are good options.

  • 2 wide-mouth water bottles - A 1-litre water bottle is essential for hydrating at lunch, around camp, and refilling throughout the day. Stay away from glass and heavy metals, and look for lexan® for durability.

  • For males, a third water bottle should be considered for use as a potty at night and must be labelled accordingly.

  • Pillow - A Thermarest® pillow that compresses down or folds into itself is ideal. A good benchmark for size and weight is 18 x 14 inches and 9 ounces total.

  • Dry bag - A 20-litre+ dry bag is great for ensuring your personal items are safe in case of rain. Cameras, wallets, money, and any other valuables can be kept dry at all times.

  • Pack cover - The pack cover is an additional item we recommend everyone carry in case we encounter heavy rains. The pack cover should have a drawstring cord and elastic edges to fit firmly over your bag. A 40-litre cover will work well on any day pack.

  • Trekking poles - Collapsible poles are great for steep downhill terrain and assistance uphill. If you have knee problems, they reduce the impact on your joints by 20-30%. A nice soft foam grip will help prevent blisters, and poles with an aluminium shaft are durable and lightweight.

  • Camp towel - The camp towel should be made of a polyester-nylon blend that dries quickly and compacts tightly in your pack. The large size (50 x 27 inches) is a good size and can be used to wash up at the end of the day. Stay away from house or beach towels.

OPTIONAL ITEMS:

  • Camera

  • Paperback book

  • Journal with pen or pencil

  • Personal first aid kit (band-aids, moleskin or second skin, ibuprofen, aspirin)

  • Hand sanitizer

  • Sani-wipes

  • Hand and feet warmers (2x) - Gel/air activated are best

  • Bandanna

  • Cell phone with solar charger, e.g. Solar Monkey charger, since tri- and quad-band phones work on Kilimanjaro

  • Flavoured chocolate/energy bars for snacks

  • A supply of rehydrate sachets

  • 2 extra garbage bags for waterproofing and separating dirty laundry

  • Earplugs

  • iPod or MP3 player

  • Pocket knife

  • Water flavouring to mask the iodine taste in the purified water

Know before you go

All airport transfers are part of the package, and no extra fee is required.

THE BEST MONTHS TO CLIMB KILIMANJARO

  • Normally, March, April, and May are the months with long rains and should be avoided.

  • November usually has short rains, but it does not often rain every day, so climbing is possible.

  • The best months for climbing Mount Kilimanjaro are January, February, August, and September.

  • July can be colder, and November to December can be wet.

  • January to February are the warmest months, with skies almost clear of clouds each evening and morning.

  • The success rates with our guides are outstanding compared to the overall success rates for all climbers who attempt to reach the top.

SUMMIT SUCCESS RATES: STELLA POINT (98%). UHURU PEAK (96%).

Logistics

Meeting & route

Meeting point
Kilimanjaro International Airport, Kilimanjaro Airport Road, Tanzania
Tour start
Arusha, Tanzania
Tour ends at the same location as the start point.
End of the journey

Your 10 days finish where they began, in Arusha.

Watch the tourHQ film Watch the film

Create your own adventure

Can't find the perfect tour? Tailor your dream trip.

  • Tell us your destination, dates and group size.
  • Our travel experts and local guides design a tailored itinerary, just for you.
  • Enjoy your trip with peace of mind, knowing everything is taken care of.
Plan my holiday

Say goodbye to travel stress.

Starting from

USD 2,400 /person
Book This Tour

Estimated room rates

Single Room $2,400.00 — $4,800.00
Double Sharing $2,400.00

When

Travellers

Total